In this tutorial, I’m going to walk you through how to letter on a wine glass, what pen to use, how to fix your mistakes and more!
So you wanna do some pretty hand lettering on glassware but… what pen do you use? How do you make it permanent? What if you screw up, how do you fix it?
First Things First…
The links below may be affiliate links where appropriate. This means that your purchase through these links may result in a few cents in payment to me, to support creating further resources like this one! That being said, I will never suggest supplies that I do not personally use and fully recommend.
Tools Mentioned
- A glass
- Craftsmart Oil Paint Pen (you DO NOT want to use water-based OR acrylic paint for this!)
- Stabilo All Pencil
- Acetone
- Masking Tape
- Paper Towel
Prefer watching over reading? Feel free to skip right to the video and see these in real-time! ??
Step 1: Clean off your glass
Using just a little soap & water (or alcohol/acetone), make sure there is no residue or coating that could cause the paint to not stick well.
Step 2: Plan your design
In this example, I am writing “THE Mrs.” – it’s a gift for a bride.
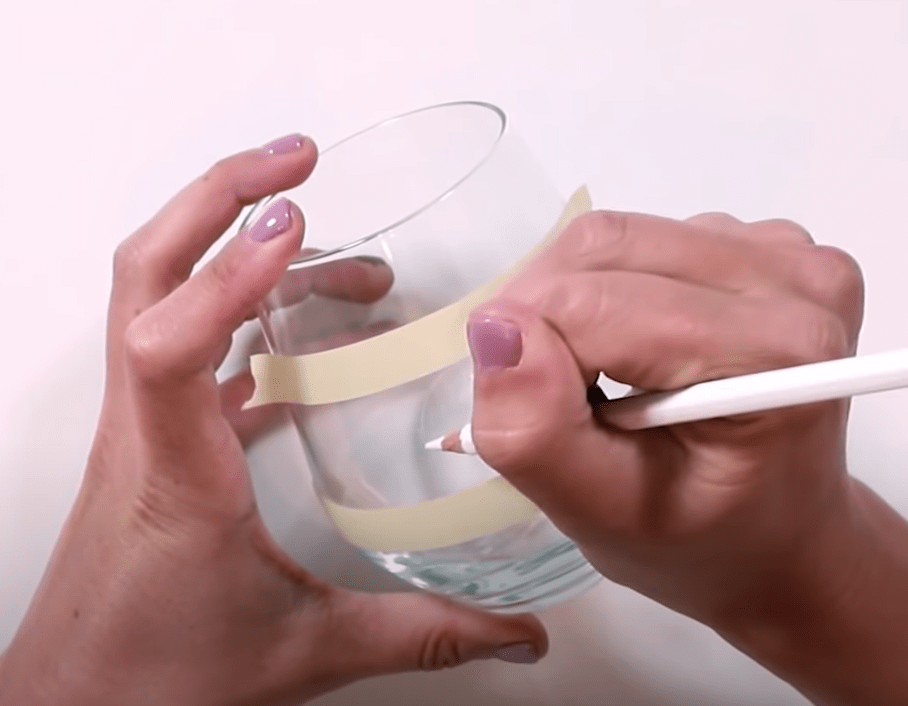
Step 3: Transfer your design to the glass
There are two ways to do this:
- You can use the Stabilo ALL pencil to sketch directly on the glass
- You can take a piece of paper and cut it out to be about the size of what you want, and stick it inside for a visual
With the second method, you need to write your words on the paper, place it inside, and trace over it – I find this way very annoying because depending on the shape of the glass, it’s hard to get the paper flat.
So, I like to stick with the Stabilo and tape!
Once you’re happy with the sketch, peel off the tape.
Step 4: Go over your design with your oil-based pen
Using the faux calligraphy method, I trace over the lines I just did with the paint pen.
Be sure to go back over and thicken the lines before the ink dries, and avoid smudging your work as you go!

If you make a mistake, just use a Qtip and acetone! Be sure the spot is dry before using the paint pen on it again.
Be sure to also keep your design away from the drinking part of the glass, as the paint is not considered food safe.
How do I make this permanent?
Step 5: Baking it in the oven to set it
I’ll preface this by saying that this is a handmade product, and it will NEVER be 100% permanent. I always, always, ALWAYS tell that to my clients, and I tell them to be careful with it, don’t scrub the lettering, and don’t put it in the dishwasher.
- Put the glass in the oven BEFORE it’s heated up; we want to make sure not to shatter the glass.
- Heat it up to 200-250 F (120 C) – not too high. Wine glasses are typically not “oven grade” glass.
- Leave it in for an hour or so.
- Turn the oven off and wait for it to completely cool. Then, remove.
This oil paint doesn’t easily come off just by touching or scratching it, or even water. You could leave it like this, and it’s pretty darn permanent unless you purposely try to scrub it off.
However, I do like to take it one step further and bake it in the oven to set it. This just gives me a little more peace of mind that it’ll be more durable. Doing this makes it “technically” washable, (meaning this will make the paint more durable), but I can’t guarantee how long it will last, and it’s preferable to handwash it vs. put it in the dishwasher.
And that’s a wrap!
I hope you enjoyed this tutorial! By the way, if you’re unsure what paper to use for calligraphy, be sure to check out this video where I talk about the different types of paper I use.


Hi Becca, can I follow the same steps to write on mugs?
P.S. I love your work! And just signed up to Show Me Your Drills! ?
Adding a little comment… I’ve been practising for some days with a Sharpie oil based pen on glass, but I’m not really happy with it. When it dries it’s like the pen is not even, not uniform. I can’t see why. ?
Your tutorial was brilliant and you make it seem so easy and not scary to try
Thank you